Secure Spring Rest API using OpenId Connect And KeyCloak - Part 4
- Dennis Chacko

- Nov 9, 2020
- 3 min read
Overview
In Part 1 of this series, we covered registering our Student API with Keycloak as a OAuth 2.0 client application.
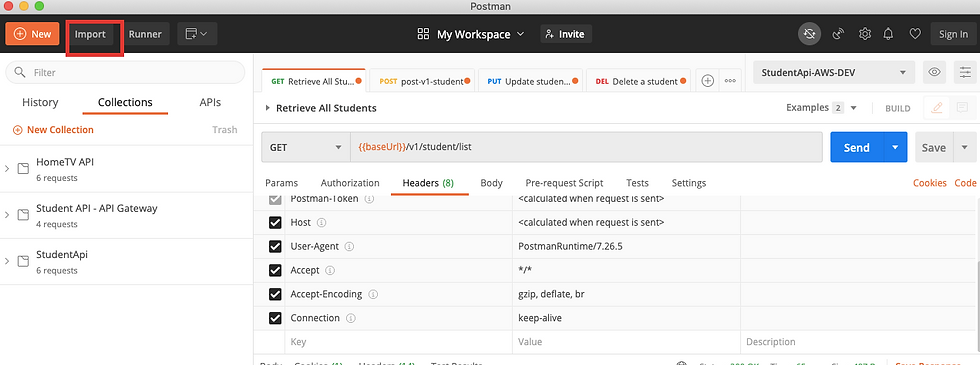
In Part 2 of this series, we covered the source code of the Student Service which uses Spring Security's OAuth 2.0 support to implement security. We also used Postman to verify that the service is secured against unauthorized requests.
In Part 3 of this series,we covered registering an authorized client in KeyCloak and using Postman to make authorized calls to our service
In Part 4 of this series we'll go through a step-by-step instruction on how to setup WebClient to access OAuth2 secured resources using Spring Security’s OAuth2Client module. In particular, we’ll be documenting the OAuth 2 client credentials grant type. The Client Credentials grant type is used by clients to obtain an access token outside of the context of a user.
GitHub Repository for the Student Service
The OAuth secured REST API we would be using is the StudentService API. The source code for the service is available in GitHub with detailed instructions on how to compile, run and secure it using Keycloak. The GitHub repository for the Student Service API is available here
OAuth2 Client Registration
We should now have our StudentService API running locally. We now have to register our client with the StudentService. Once registered, we get the below 5 properties that allow us to identify ourselves as authorized clients of the StudentService
Note: These values should be available to us from Part 3 of this series
Client id: This is a unique identifier similar to a user id
Client Secret: This is similar to password
Scope: Scope identifies the role or access we are given. This could either be a read-only role or a write/admin role
Token uri: This is the service url that takes the above 3 parameters, and if successfully validated, returns back to us an authorization code. This authorization code can then be used to invoke the StudentService
StudentService Endpoint: This is the actual StudentService url or endpoint that would require the authorization code before allowing us access to the service operations
Setting up the Spring Boot project for the OAuth2 Client
Hop over to the Spring Initializer website to get started bootstrap the Oauth2 Client project. This website helps you to get up and running with a Spring Boot application in minutes by creating all required broiler plate code. Click the Add Dependencies button and choose the below dependencies
Spring Security
Spring Web
Spring Reactive Web
OAuth2 Client
You should then be able to download a starter Spring Boot application. You can also choose to fork this project from GitHub. The source code is available here.
The application-* property files
We now start configuring Spring Security to use our Oauth2 client properties we recieved when we registered ourselves with the StudentService API. We add these properties to the below two properties files:
application-dev.properties file
application-test.properties file
We do this more from a coding best practice. Generally as part of software development, we build our code once, but we deploy to different environments such as development environments where developers test their code, the test environment where the QA team test their code, and the production environment where the fully tested, final release is deployed. Each of these environments have different servers, databases etc. Information about these servers and databases are stored in different property files.
The OAuth2Config class
We now create a Oauth2Config class to configure Spring Security, Oauth2 and WebClient to all work together. The purpose of this class is to
Create a OAuth2AuthorizedClientManager that will read our properties from the application-*.properties file and authenticate our API calls with the StudentService API. IF we are running locally or in the development environment, we'll pickup the application-dev.properties file
Create a "Oauth2" aware Webclient by wiring up the Webclient class with the OAuth2AuthorizedClientManager. The Webclient will be making calls to the StudentService API. Before doing the call, the Webclient will delegate the responsibility of authentication and authorization code generation to the OAuth2AuthorizedClientManager class
The StudentApi class
This class is where it all comes together. We inject the OAuth2-aware WebClient to make a call to the StudentService API. The elegance of this solution is that the entire process of authenticating with our calls with the StudentService, getting an authorization code and then sending that authorization code in the HTTP headers to the StudentService is handled by Spring Security. We get to focus on just the business of invoking the service and processing the response
Testing the code
As best practice, let's write a Junit TestCase to verify that this actually works.

Comments