Secure Spring Rest API using OpenId Connect And KeyCloak - Part 2
- Dennis Chacko

- Oct 3, 2020
- 3 min read
Updated: Oct 9, 2020
Overview
In Part 1 of this tutorial, we covered KeyCloak and registering our StudentService REST API as an OAuth 2 client. We now delve into the source code of StudentService. We'll use Spring Security 5 OAuth 2 functionality to secure the service. Any calls to the service will be intercepted by Spring, sent to KeyCloak for token verification before being allowed access to the API. We'll test this using a popular API client called Postman. Since the API is secure, every call to the API using Postman will return back a 401 Unauthorized error
Download the source code
All the source code for this tutorial can be cloned from the GitHub repository available here
The StudentService Overview
The StudentService Spring Reference Implementation is a simple CRUD API for creating and deleting students. An H2 database is used for persistence for the sake of simplicity. We'll not be discussing how the service creates and deletes students. We'll instead focus on how we can secure the create/update and delete operations using KeyCloak and OpenId Connect.
The Oauth2WebSecurityConfigurerAdapter class
The Oauth2WebSecurityConfigurerAdapter class configures Spring Security at the web request level.
In lines 21-27, we first allow public access to all Swagger UI endpoints. This allows interested users to view the API documentation without the need to authenticate with the service
Next, in lines 35-42, we add Oauth2 server support to the API endpoints
The StudentController class
In the StudentController class we specify the access rights to each of the operations in our service. This is security at the method level. A user might be authorized to use only certain operations in the service depending on their role. We use the @PreAuthorize annotation to specify the scope (or role) each method requires
For the read operations, we have specified that users with read and write scopes have access. We can do this by using the @PreAuthorize annotation.
For the create, modify and delete operations, we specify that only authenticated users with the scope of StudentService-write are authorized. We do this using the @PreAuthorize("hasAuthority('SCOPE_StudentService-write')").
If you remember, in Part 1 of this tutorial, the ClientScope of StudentService-write was created in KeyCloak. This scope is assigned to an authorized user when they authenticate themselves in KeyCloak. We'll cover this in Part 3 of this tutorial.
The application.properties file
The application.properties file contains our KeyCloak server details. See lines 16 and 17 below.Spring Security uses this information to connect to KeyCloak and verify the credentials of each user attempting to access the StudentService API. The uri(s) have standard formats
spring.security.oauth2.resourceserver.jwt.issuer-uri: http://localhost:$port/auth/realms/$realm
spring.security.oauth2.resourceserver.jwt.jwk-set-uri: http://localhost:$port/auth/realms/$realm/protocol/openid-connect/certs
where :
realm = the name of the realm configured in Part 1 of this tutorial. We had named it MicroServices
port : the port the Keycloak server is running on. If you used the docker-compose.yml from Part 1 of this tutorial, the value should be 9080.
Build and run the application
We'll be using Apache Maven 3.x to build the application. Maven is available as a free download from Apache here
The application can be built by running the command :
mvn clean package -DskipTests=true
This command needs to be run in a command prompt and in the same folder that contains pom.xml file. Once the application has been built successfully, we can run the application using the command
mvn spring-boot:run
We should now have the StudentService REST API application running at port 8080
The Swagger UI should be accessible at http://localhost:8080/swagger-ui/#/
Download and install Postman
Postman is a collaboration platform for API development and testing. It is used extensively for testing APIs to confirm that they work as per REST API standards. Postman can be downloaded and installed from here
Once installed, We'll import the StudentService's OpenAPI 3.0 specification file. Click on the "Import" button in the upper dark menu bar.
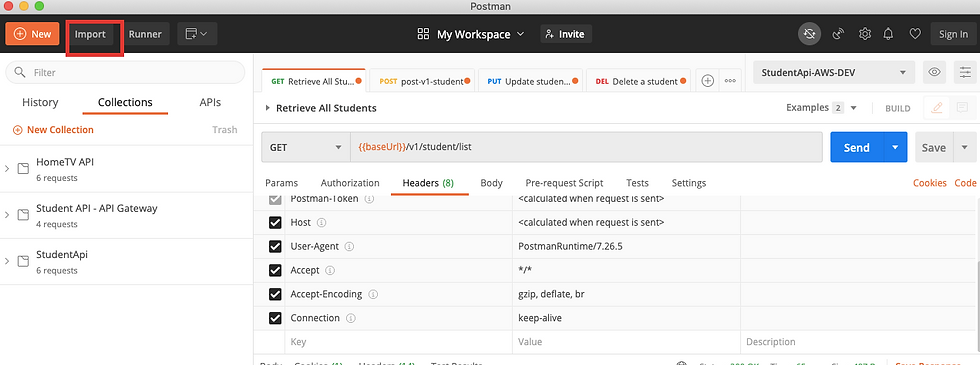
Select OpenAPI. This should open a file chooser dialog. Navigate to the source code's folder. Under the sub-folder named reference, choose the Student-API.v1.yml file
Postman will now import the StudentService API specification file. This file has sample requests for each of the API's operations. This makes it easier to test the API in Postman. You should now be able to invoke the Student API operations from Postman
Select the Get All Students operation and click on Send. You should see a 401 Unauthorized error

Now select the Add New Student and click on Send. You should now a get 403 forbidden error.

This is the anticipated behavior since we should only allow authenticated users with the correct roles to access our API. In the next post, we'll configure Keycloak to grant Postman and any other authorized OAuth 2 client access to our API.
Stay tuned for Part 3 of this tutorial
References

Comments